https://help.webinarkit.com/help/how-to-use-one-click-registration-links-for-your-events
Get the one-click registration link for your event
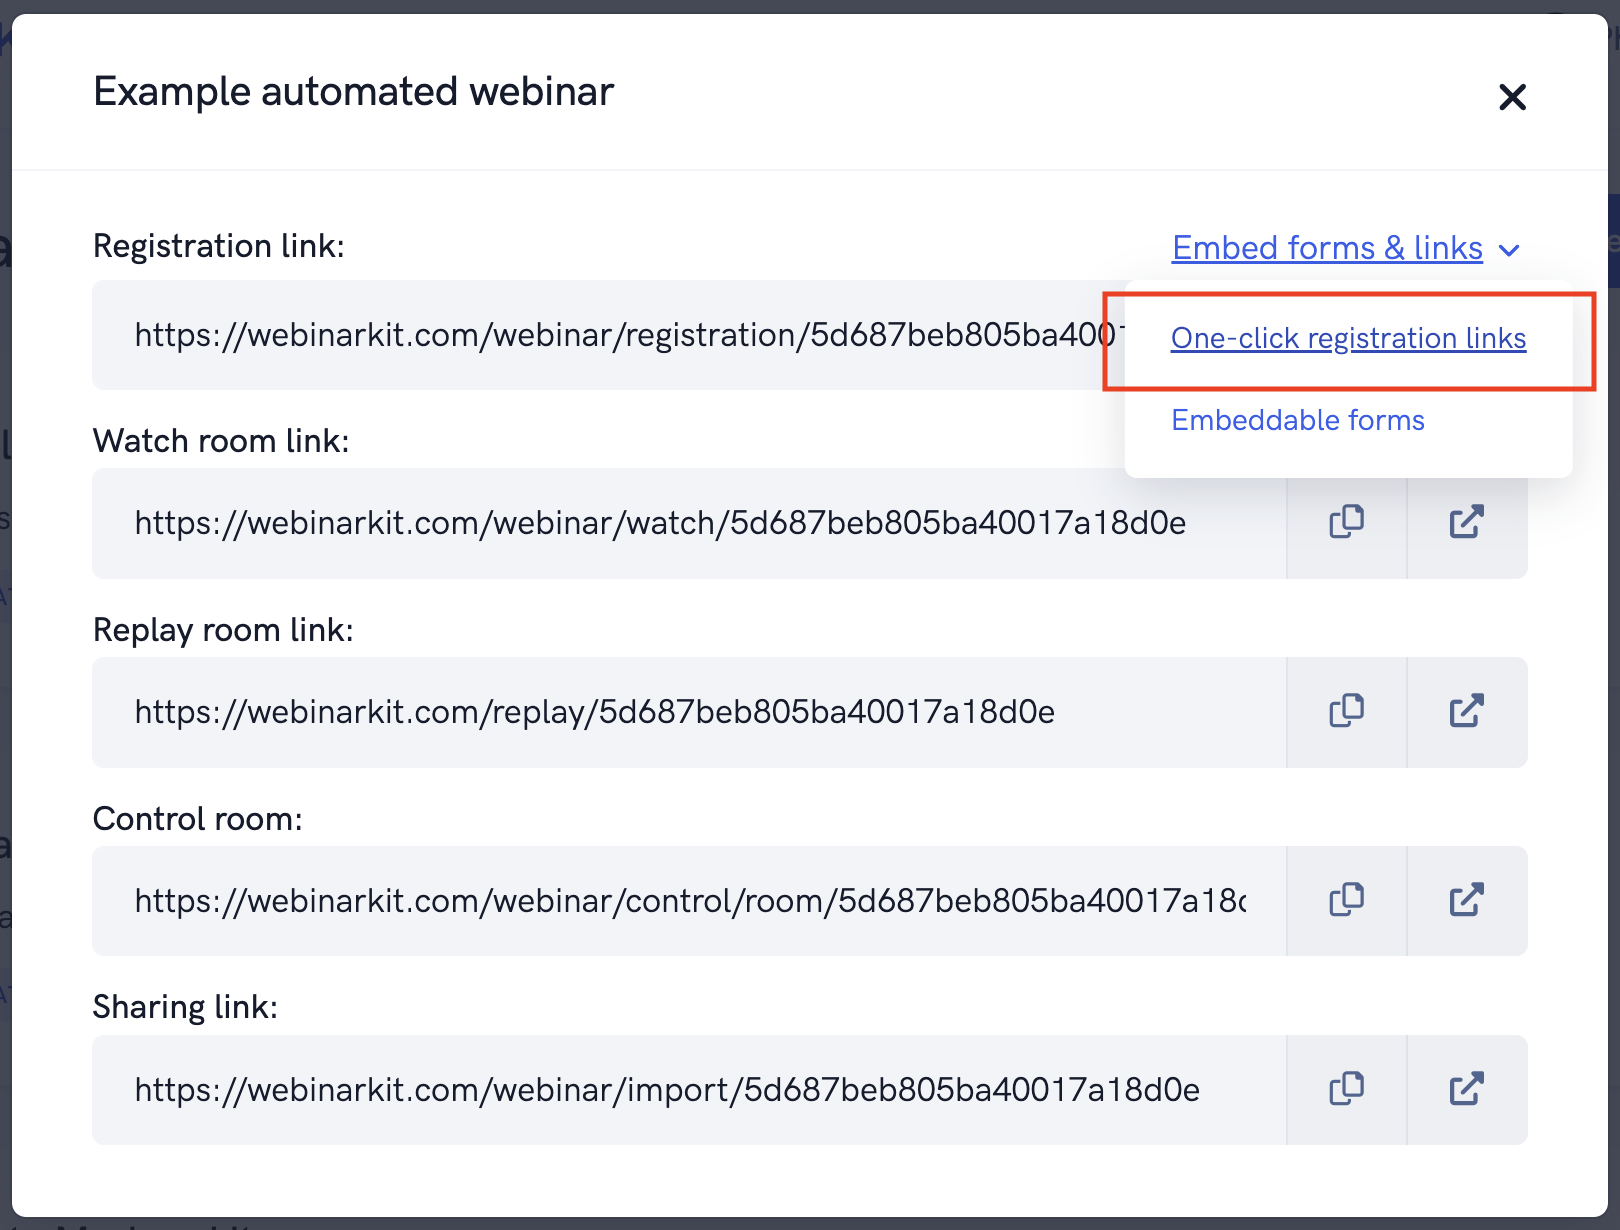
First go to your webinars dashboard. Click the "Get links" option for the event you want. From the pop-up, click "Embed forms & links". From the dropdown, click "One-click registration links".
On the next pop-up that appears, select the date/time schedule that you want the one-click registration link to enroll registrants in. You can select any schedule you've added in your webinar settings. That means you can select "specific" session date/times, "ongoing" session dates/times (Example: The next session occurring on Friday at 3 PM), and just-in-time sessions. Instant watch sessions are also supported: Simply enable instant watch sessions in your webinar settings and the one-click registration link will override whatever date option is appended to the link.
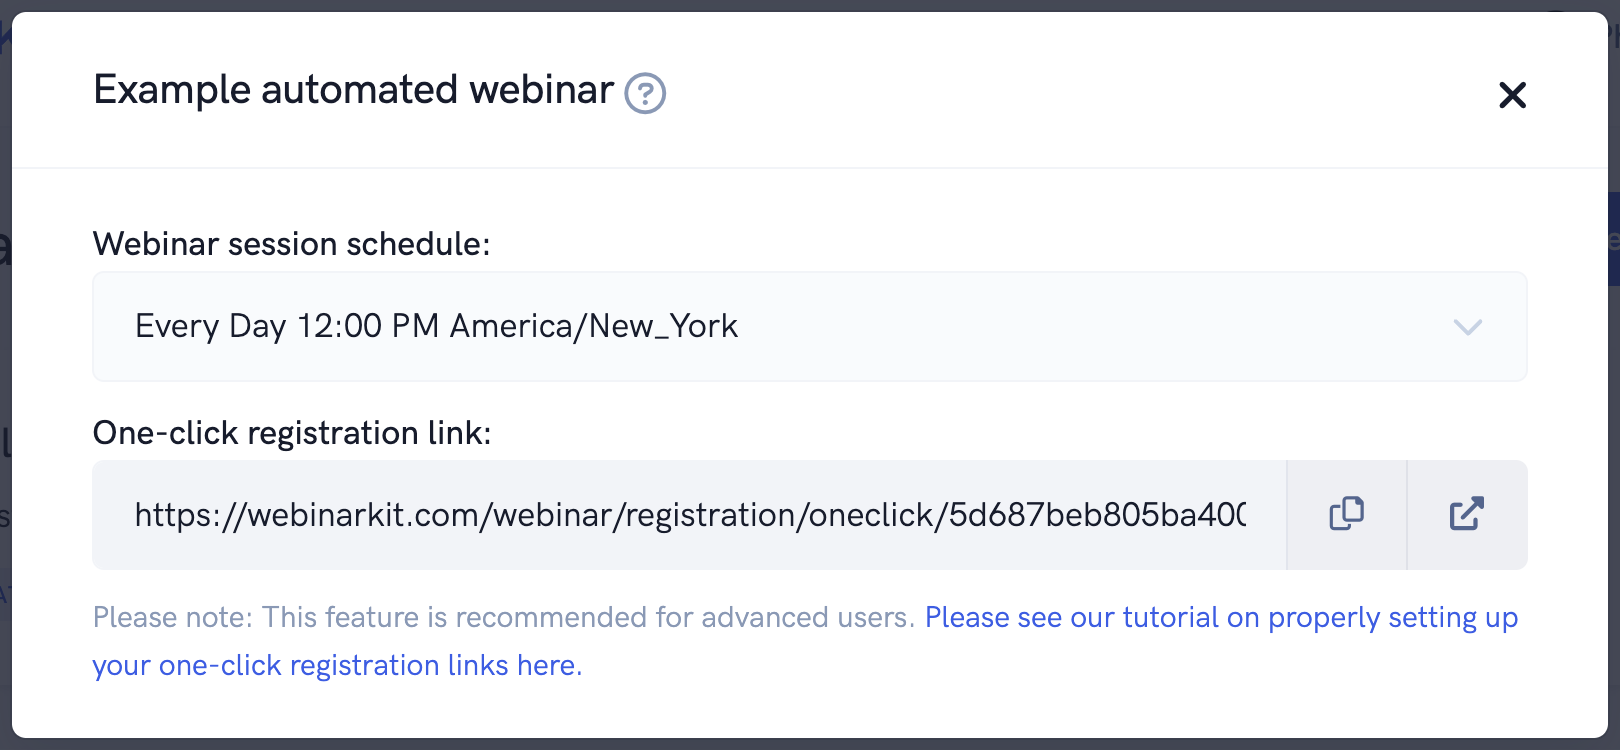
After selecting the schedule you want your one-click registration link to use, copy the link.
Add registrant details to your one-click registration link
Now that you have your link, you'll need to append the registrant details to it before using it. Below is a simple example where we simply append an email address to the end of the link. This will create a registration for the event using the email appended to the link:
https://webinarkit.com/webinar/registration/oneclick/5d687beb805ba40017a18d0e?date=jit_15&email=somecontact@email.com
Notice in particular the "&email=somecontact@email.com". When setting up your one-click registration links, you'll need to replace "somecontact@email.com" with the contact's email address. Let's use a CRM/email platform as an example of how this would work in practice.
One-click registration links support the following fields appended to the URL:
email
first_name
last_name
phone_number_country_code
phone_number
custom_field_1
custom_field_2
custom_field_3
custom_field_4
custom_field_5
Customizing your one-click registration link with your CRM or email platform
Say you're setting up an email broadcast inviting your email list to register for your upcoming event. In your email, you would use the CRM/email platform's personalization/merge features to append the contact's email address to your one-click registration link. Below you'll see a screenshot example of what this looks like in the email platform ConvertKit:

Notice how the "{{ subscriber.email_address }}" is used. This will be replaced by the contact's actual email address when that contact receives the email which is how WebinarKit will fill in the registrant's details for the event. Please note, every email platform/CRM is different so you'll need to replace the "{{ subscriber.email_address }}" with whatever your platform uses for personalization. Also, please note, it is best to URL encode the data appended to the one-click registration link. Many CRMs/email platforms support this as well so please consult their documentation on how to do this.
Some more examples:
A one-click registration link that creates a registrant with Joe Schmo as the name, somecontact@email.com as the email, and some custom field data:
https://webinarkit.com/webinar/registration/oneclick/5d687beb805ba40017a18d0e?date=jit_15&email=somecontact@email.com&first_name=Joe&last_name=Schmo&custom_field_1=Some+custom+field+data
A one-click registration link that creates a registrant with contact data dynamically passed in via a CRM/email platform:
https://webinarkit.com/webinar/registration/oneclick/5d687beb805ba40017a18d0e?date=jit_15&email={!email}&first_name={!name}
Examples of personalization on popular CRM/email platforms:
Active Campaign
first_name=%FIRSTNAME%
last_name=%LASTNAME%
email=%EMAIL%
Aweber
first_name={!name} or firstname={!firstname}
last_name={!lastname}
email={!email}
ClickFunnels
first_name=#FIRST#
last_name=#LAST#
email=#EMAIL#
phone_number=#PHONE#
ConvertKit
first_name={{ subscriber.first_name }}
email={{ subscriber.email_address }}
Get Response
first_name=[[name]] or firstname=[[firstname]]
last_name=[[lastname]]
email=[[email]]
Keap
first_name=~Contact.FirstName~
email=~Contact.Email~
MailChimp
first_name=*|FNAME|*
last_name=*|LNAME|*
email=*|EMAIL|*
Không có nhận xét nào:
Đăng nhận xét