sudo yum install python-certbot-apache
Hiển thị các bài đăng có nhãn Certbot. Hiển thị tất cả bài đăng
Hiển thị các bài đăng có nhãn Certbot. Hiển thị tất cả bài đăng
Configure automated certificate renewal
Tutorial: Configure SSL/TLS on Amazon Linux 2 - Amazon Elastic Compute Cloud
Configure automated certificate renewal
Certbot is designed to become an invisible, error-resistant part of your server system. By default, it generates host certificates with a short, 90-day expiration time. If you have not configured your system to call the command automatically, you must re-run the certbot command manually before expiration. This procedure shows how to automate Certbot by setting up a cron job.
To automate Certbot
Open the
/etc/crontabfile in a text editor, such as vim or nano, using sudo. Alternatively, use sudo crontab -e.Add a line similar to the following and save the file.
39 1,13 * * * root certbot renew --no-self-upgradeHere is an explanation of each component:
39 1,13 * * *Schedules a command to be run at 01:39 and 13:39 every day. The selected values are arbitrary, but the Certbot developers suggest running the command at least twice daily. This guarantees that any certificate found to be compromised is promptly revoked and replaced.
rootThe command runs with root permissions.
certbot renew --no-self-upgradeThe command to be run. The renew subcommand causes Certbot to check any previously obtained certificates and to renew those that are approaching expiration. The
--no-self-upgradeflag prevents Certbot from upgrading itself without your intervention.
Restart the cron daemon.
[ec2-user ~]$sudo systemctl restart crond
How To Use Certbot Standalone Mode to Retrieve Let's Encrypt SSL
How To Use Certbot Standalone Mode for Let's Encrypt Certificates | DigitalOcean
We can now run Certbot to get our certificate. We’ll use the --standalone option to tell Certbot to handle the challenge using its own built-in web server. The --preferred-challenges option instructs Certbot to use port 80 or port 443. If you’re using port 80, you want --preferred-challenges http. For port 443 it would be --preferred-challenges tls-sni. Finally, the -d flag is used to specify the domain you’re requesting a certificate for. You can add multiple -d options to cover multiple domains in one certificate.
When running the command, you will be prompted to enter an email address and agree to the terms of service. After doing so, you should see a message telling you the process was successful and where your certificates are stored:
OutputIMPORTANT NOTES:
 - Congratulations! Your certificate and chain have been saved at
   /etc/letsencrypt/live/example.com/fullchain.pem. Your cert will
   expire on 2017-10-23. To obtain a new or tweaked version of this
   certificate in the future, simply run certbot again with the
   "certonly" option. To non-interactively renew *all* of your
   certificates, run "certbot renew"
 - Your account credentials have been saved in your Certbot
   configuration directory at /etc/letsencrypt. You should make a
   secure backup of this folder now. This configuration directory will
   also contain certificates and private keys obtained by Certbot so
   making regular backups of this folder is ideal.
 - If you like Certbot, please consider supporting our work by:

   Donating to ISRG / Let's Encrypt:   https://letsencrypt.org/donate
   Donating to EFF:                    https://eff.org/donate-le
We’ve got our certificates. Let’s take a look at what we downloaded and how to use the files with our software.
Đăng ký:
Bài đăng (Atom)
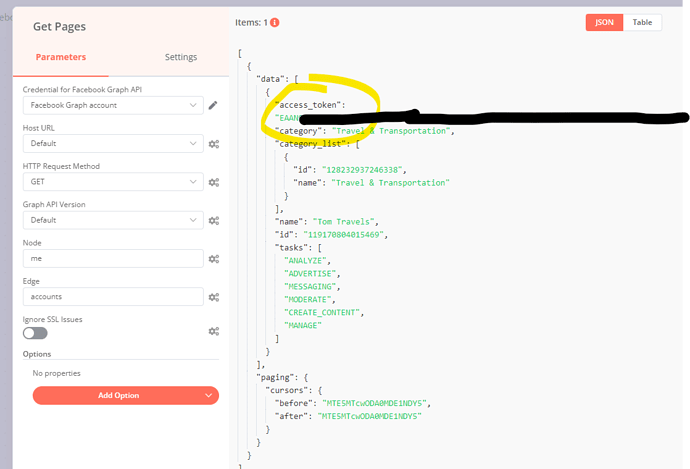
Renewing Facebook Graph API token automatically?
Mã truy cập dài hạn https://developers.facebook.com/docs/facebook-login/guides/access-tokens/get-long-lived/ https://community.n8n.io/t/re...